Notes Website
A website to store my notes
Content format
The format I chose for the content is MDX, I had heard good things about it, and used it a bit when contributing to the Vercel documentation. It allows me to use standard markdown syntax but also allows for adding in JSX components. Another benefit is that it uses Remark and Rehype for markdown processing, allowing for the use of the wide range of plugins.
Plugins
I use the rehype plugin @mapbox/rehype-prism to add Prism syntax highlighting to the content, I use the prism-atom-dark theme.
To use LaTeX I adapted the remark-math plugin so that it prevents the content from being formatted by remark in the build step, but doesn't remove the delimiters. This is because I process the formulas on the client side rather than in the build step. This gives a great performance benefit for both the build step and the user as the processing of a large amount of LaTeX such as I was using was leading to page sizes getting above 500kb, which took a long time to build and a long time to deliver. By keeping the file size down and passing the KaTeX library to the client the lighthouse performance score increased by 10 points and the build time reduced by several minutes.
I also have the remark-emoji plugin enabled which allows you to insert emojis as you would in slack because it seems fun.
Components
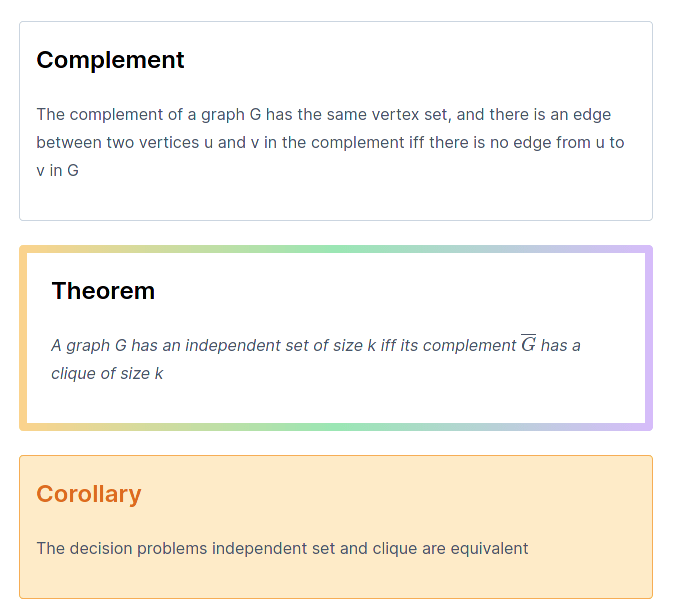
I have created a range of components for the pages for things such as definitions. You can see a selection of them here:
An alternative to this would be to use remark-adminitions or another remark based solution, but I get a greater flexibility by using react components, such as that in the problem component, the two sections are passed as props for better consistency. For a lot of these components, I also have the option to specity a title, such as that for theorem, if the name prop is passed, it will also display the name.
One drawback of this is that the content passed to the component no longer gets processed as markdown, so I perform markdown processsing inside the component.
There is a bit of a nasty problem with compoinents though in that the content passed in as the child of a component gets formatted before being passed through, leading to problems with backslashes being removed as they are seen as escape characters. I have to use String.raw on the component side whenever passing through LaTeX, which is a bit of a pain.
Styling
All the styling is handled through Tailwind CSS, this was my first time using the typography plugin, and I was hugely impressed. It saved me a lot of time in ensuring the main content was nicely styled. There was some issues with my React components, as the plugin was also styling those, but I managed to make the components look ok regardless.
Images
Images were somewhat tricky as I couldn't use the same format as I had before where the images are with the content as images have to be served through the public directory. My solution to this was to create a very similar hierarchy in the content and images folder so that images are easy to find.
Another thing I did with the images was to convert them all to webp to improve pagespeed and reduce bandwidth usage. This was very good, reducing the total image size by over half.
Algolia Search
To provide search for this website I used Algolia DocSearch. Sadly as this isn't a documentation website I couldn't get it all provided for free, but luckily there is a very generous plan available for free with the GitHub education pack that provides everything I need.
The crawler is ran as a GitHub action so that it will be crawled every Saturday at 00:00 and can also be crawled whenever needed. This runs the docker container provided by Algolia with config.js and the environment variables provided via GitHub secrets.
The setup for this was relatively easy as the Algolia documentation is very good. One problem the crawler had was that the pages on the site don't have links to each other as they are rendered when you interact with the site. I solved this by generating a sitemap and passing this to the crawler instead. The search box styling provided by Algolia also isn't mobile friendly which is a bit of a pain, but can easily be solved with the workaround given in this GitHub issue. I'm looking forward to DocSearch v3 which is set to come out soon.
Sitemap
As I mentioned above, I needed to generate a sitemap for Algolia search, this also has a benefit in providing better SEO as the Google crawler can also access the pages easier with a sitemap. However generating one of these was somewhat tricky due to the fact I am using catch all routes, so it isn't apparent from the source code what the paths will be. The best solution I found was to use nextjs-sitemap-generator and passing it my MDX content directory as my pages directory, which gives it all the content pages. Sadly this does mean it doesn't show the index page, but that hasn't been a problem yet.
Diagrams
This site allows for custom diagrams from both mermaid js and all the providers on Kroki, although only graphviz is implemented from Kroki.
The solution to this was by using the feature of MDX to overwrite components, I used this to overwrite both the pre and code components.
The pre component was simple, the only reason I needed to overwrite it was that pre components were styled by tailwind-typography and so using a div was more appropriate.
The real code lies in the code component. First I worked with the mermaid API. This was simple as it just required the string to be base 64 encoded, so I used the base-64 npm package and appended it to the link.
var result = base64.encode(props.children);
return <img src={"https://mermaid.ink/img/" + result} />;
Kroki was more complicated as it required 4 steps:
- UTF8 encode the string
- Compress the string
- Base 64 encode the string
- Replace any symbols that would cause issue with the URL with dashes
For UTF-8 encoding I just used the uft8 package, but the compression required the pako package, but it all worked out fairly simply
var bytes = utf8.encode(props.children);
const compressed = pako.deflate(bytes, { level: 9, to: "string" });
var result = base64.encode(compressed).replace(/\+/g, "-").replace(/\//g, "_");
return <img src={"https://kroki.io/graphviz/svg/" + result} />;
Open Graph Images
I wanted to generate open graph images as they look good to have, and that when I was posting links to the site, Facebook was taking a random image from the site and using that as the open graph image.
The starting point for this was og-image by Vercel. This allows you to generate an image for the open graph protocol by adding parameters in the URL. However this needed some tweaking as the default version includes images of Vercel products, which I did not want, and only allowed for one line of text, where I wanted two.
Making these changes were fairly simple. When it came to removing the image, it was just a case of removing everything with the image variable. Typescript was of benefit here as more warnings were presented when incorrect variable types were passed.
Adding the second line of text was slightly more complex as I had to decide on how this information would be included in the URL. As the original method used a subdirectory, I decided to add a second for the second line, so the URL would look like. example.com/first_line/second_line. This was a simple case of splitting the variable used for the line of text on slashes and assinging one to each line. I also included a simple if statement to check if the second instance was undefined, in which case it wouldn't be presented.
Finally I wanted to have the second line of text be smaller, as a kind of subheading. The original application gives the option for setting font size, and I wanted to keep that. I considered allowing for the setting of two font sizes, but given I was always going to want the second line smaller I decided against it. Instead I set that font size on the parent element of both lines of text, then used font sizes as a percentage to make the second line smaller.
I then needed to integrate this into my website. Getting this hosted was very simple, following the instructions in the original repository I got it hosted on the og subdomain of my site. Then I added them into my pages. For the homepage, I set the URL manually as the homepage just generates the one page. Then for the slug, which generates every other page, I needed to use a more complex method. I was already using the routes to generate text for the title of the pages, so I used this code to get my first line. The second line was slightly more complex as I couldn't just use the other parameter of the route as not all pages had two parameters. Instead I did a check of the length of the route and if it was long enough, used the second parameter, if not, I used "Sam's Notes". This required one final tweak as the URL generated had spaces in, as my title did, so I had to use the escape() function in JavaScript for social sites to be able to process the URL.
Exercise section
I wanted to add a section for exercises, deciding on how this should be implemented was somewhat complex. One way to implement this would for each lecture to be a folder and contain the notes and exercises. However this would involve rewriting much of the code for detecting lectures and would cause additional complexity due to my requirement for lectures to optionally have submodules.
What I settled on was a different file extension .exercise.md, instead of .md. This did have the additional complication of requiring the filename for both the notes and exercises to be the same, but this wasn't too much of a problem.
The next decision was on how these would be presented, I settled on it being a tab of the page and being generated with React, rather than being a separate page as it was easier to implement. However it is probably better for performance for them to be separate pages.
Up next was the implementation of the exercise component, I decided that I wanted it to be implemented in the following way
<Exercise>
<Question>
Question text here
</Question>
<Answer>
Answer text here
</Answer>
</Exercise>
This allows for each section to be clear and will allow for MDX to convert the text to markdown prior to sending through. In order to implement this, I needed to inspect props.children passed to Exercise to find the two components. props.children is passed through as a list, with an item for each component passed in, and these items were objects, with the key props.originalType.name being "Question" and "Answer" for each component. I used the filter method in JavaScript to isolate these components to split them into the correct sections. If only one component is passed in, an object is returned for that component, rather than a list, so I check the length initially, and just render the child if there is a single child. This allows for just presenting the question, if I have not yet worked out the answer.